

User Guide
1. What’s Included
4× Wireless Weigh Pads (this will vary on package purchased)
1× Wireless Control Box (Display Unit)
Charging Cables (for pads and control box)
Antennas (For Weigh Pads)
User Manual (this document)
2. Safety Precautions
Use on a flat, stable, and clean surface only.
Ensure all equipment is fully charged before use.Never drive over the weigh pads at speed—slow roll only.
Do not exceed the weight capacity per pad (this can be 3T or 10T).
Avoid contact with water.
3. Charging the System
Before first use:
Charge Pads: Connect each weigh pad to power using the provided charger. Charging could take 4-6 hours.
Charge Control Box: Connect the display unit to power and charge fully.
4. Setup Instructions
Step-by-Step Setup
Position the Pads
Place each pad on a flat, level surface, spaced appropriately for the vehicle’s wheelbase.
Ensure the pads are aligned and not obstructed.
Power On
Press the power button on each weigh pad until the LED lights turn on.
Press the power button on the control box/display unit.
Automatic Pairing
The control box will automatically detect and sync with the active pads.
Wait for the pads to connect. (you will see a number 0 come up when successful)
Zero the Pads
With no weight on the pads, press the ZERO or TARE button on the control box to ensure accurate measurement.
Drive over pads
Slowly drive or carefully place each wheel onto the centre of the pads.
Wait for the display to stabilize and show the total and individual wheel weights.
Record or Export Data (if applicable)
Use built-in memory or printer to save or transfer data.
5. Post-Use Instructions
Turn Off all devices after use to preserve battery.
Clean pads with a dry or slightly damp cloth—do not submerge in water or use harsh chemicals.
Store in a dry, secure location to minimise movement
6. Maintenance Tips
Check battery levels regularly and charge after each use.
Inspect for visible wear, cracks, or loose connections.
Calibrate periodically according to manufacturer guidance.
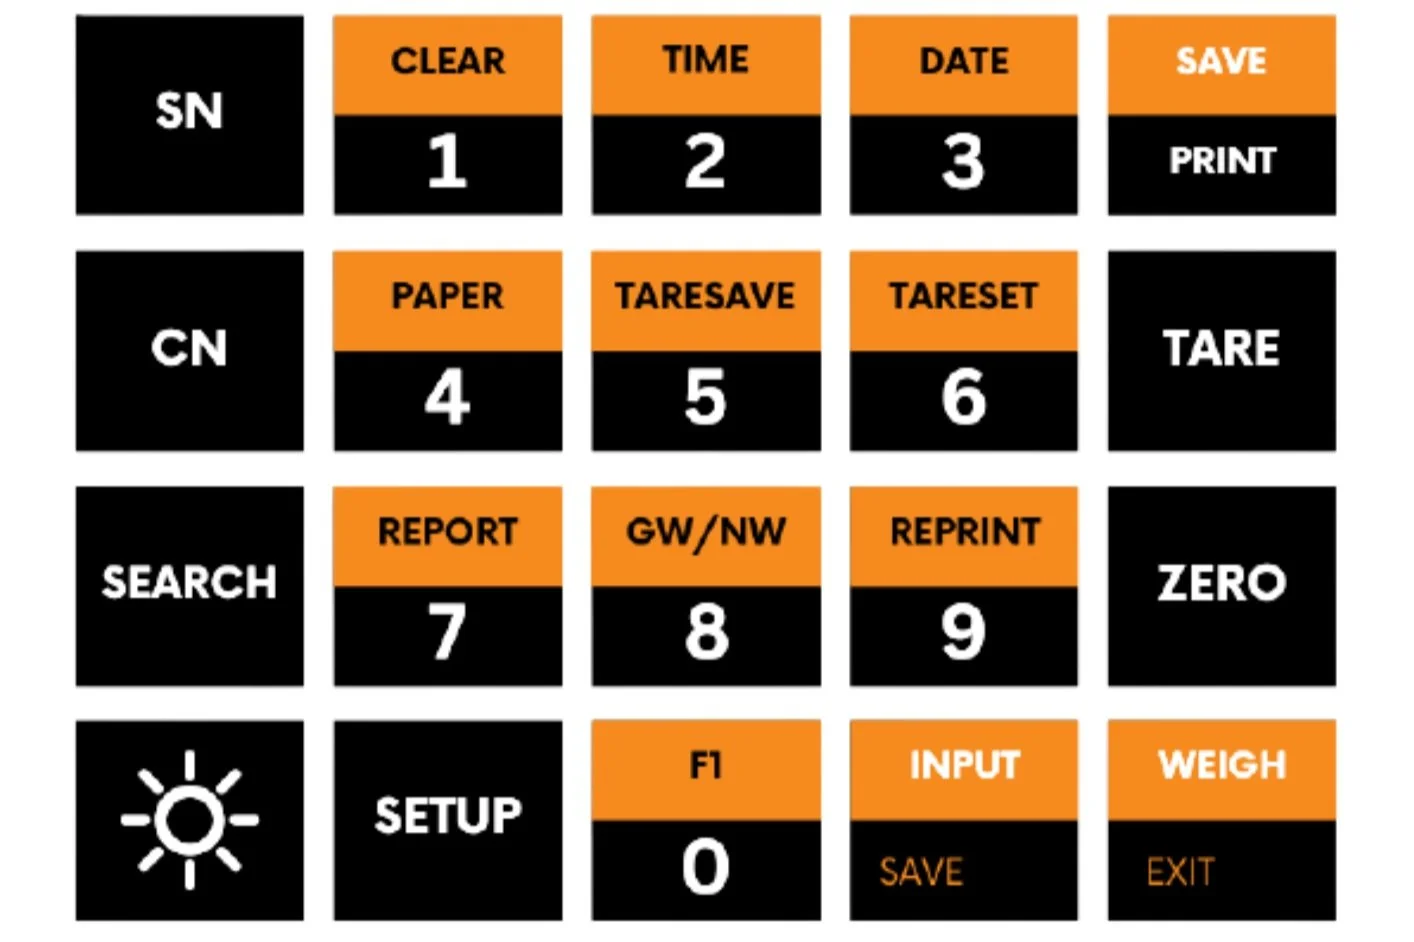
Control Box Guide
SN: This button allows you to customise weighs for your records.
CN: This button again allows you to customise your records.
SEARCH: This allows you to search those old weighs you have done.
Sun: so you can light up the screen.
1 - CLEAR: Allows you to clear records.
2 - TIME: can change the time for documentation.
3 - DATE: so you can change the date.
4 – PAPER: (not relevant)
5 – TARESAVE: Allows you to save a weight for tare.
6 – TARSET: Have a set weight for you to tare.
7 – REPORT: Search a weigh you did.
8 – GW/NW: (Not Relevant)
9 – REPRINT: Reprint your previous weights.
SAVE, PRINT: save weights and print report.
TARE: Tare the weight that’s on the pads.
ZERO: Zero any ghost weight.
SETUP: Menu.
IMPUT, SAVE: Allows you to save a setting change.
WEIGH, EXIT: Allows you to exit a mode or see each individual weight on pads
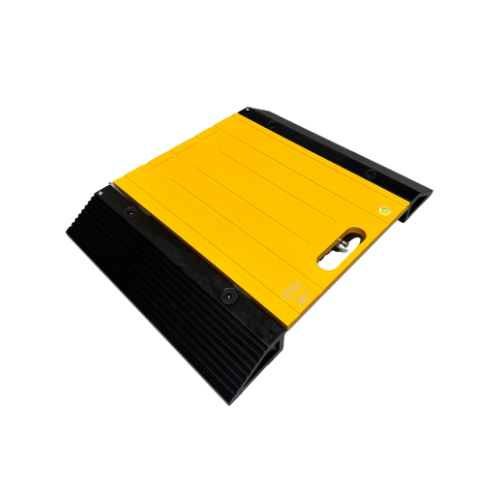
Weigh Pad

Control Box

Antenna
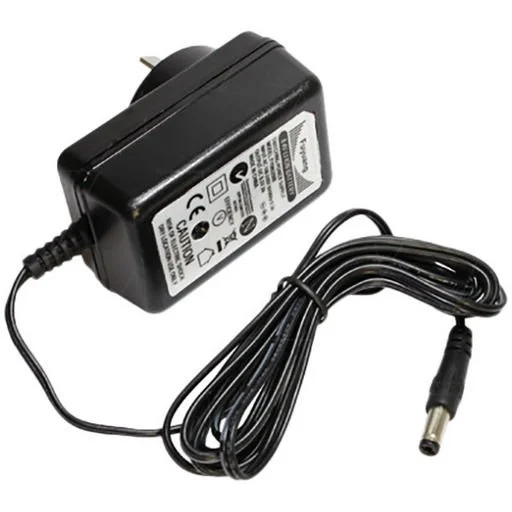
Charger